The first time you run ChroMapper (CM), you will be directed to a First Boot screen, which will ask you to fill in some options.
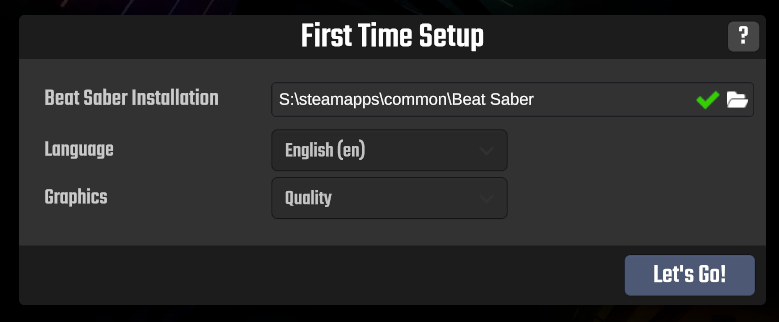
Beat Saber Installation
First, you will need to direct it to the location of your Beat Saber installation.
Okay, it doesn’t have to be an actual Beat Saber installation. We use this to find your CustomLevels and CustomWIPLevels folders, which you might remember from the installation process of Mediocre Map Assistant 2. On top of that, we also use it to find your CustomPlatforms folder, which is required for loading custom platforms into ChroMapper.
If you have Beat Saber installed on the computer
By default, CM will search for any installed copies of Beat Saber for Steam or Oculus. If found, this step can be skipped.
If not, you will have to find and enter the installation path manually:
Steam Example:
C:\Program Files (x86)\Steam\steamapps\common\Beat Saber\Beat Saber_Data\CustomLevelsOculus Example:
C:\Program Files\Oculus\Software\Software\hyperbolic-magnetism-beat-saber\Beat Saber_Data\CustomWIPLevels
If you have the Quest version -OR- don’t have Beat Saber installed on the computer:
We can get you setup with a mock Beat Saber installation to use with ChroMapper:
Download mapping-folders.zip from BSMG Git which contains pre-formatted folders that mimics a game install.
Extract the zip to a location of your choice.
Enter the path to where the zip was extracted to. Make sure the path has a
Beat Saber_Datasubfolder.
Alternatively, you can simply input a folder. CM will ask if you want to automatically generate the missing sub-folders for mapping. Click Yes and ChroMapper will make the missing folders for you.
Language
ChroMapper supports 13 languages and counting. Feel free to choose your preferred language. If you would like to contribute to new or existing languages, join our CrowdIn project here.
Graphics
Here you can choose between 3 presets, which automatically tune ChroMapper’s settings to match the power of your machine.
Quality is all dials raised to the max. All graphics options, including the very expensive Environment Reflections, will be turned on. You need a beefy computer to run this preset at high FPS, higher than a conventional VR Ready computer.
Balanced is the recommended option for most ChroMapper users. The core experience of ChroMapper will not be hindered, however some of the expensive bells and whistles will be turned off.
Performance is designed for lower-end machines, or for those who want the highest FPS possible. If you’re unsure if your PC or Laptop can run ChroMapper, try this preset. Plenty of options, such as reflections, bloom, spectrogram, and post processing, will be disabled.
No matter what graphics preset you pick, you can always manually tune ChroMapper via its Options menu.